Figures
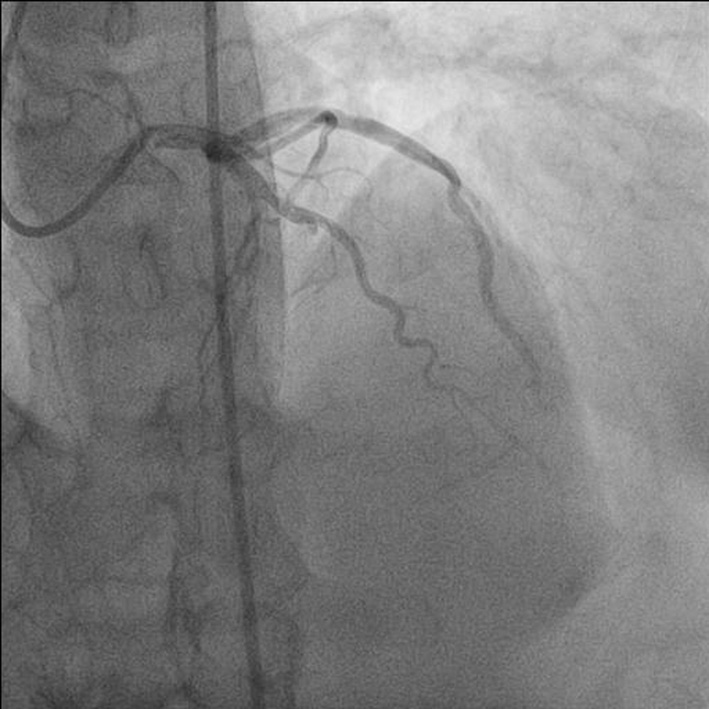
Figure 1. Antero-posterior (AP) cranial view showing total occlusion of mid left anterior descending (LAD) artery.
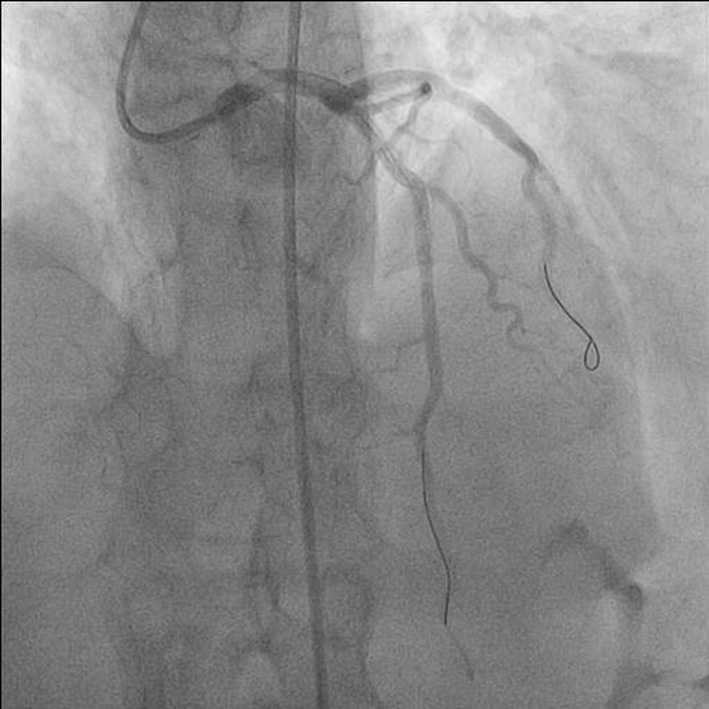
Figure 2. Antero-posterior (AP) cranial view showing post procedural TIMI III flow of left anterior descending (LAD) artery.
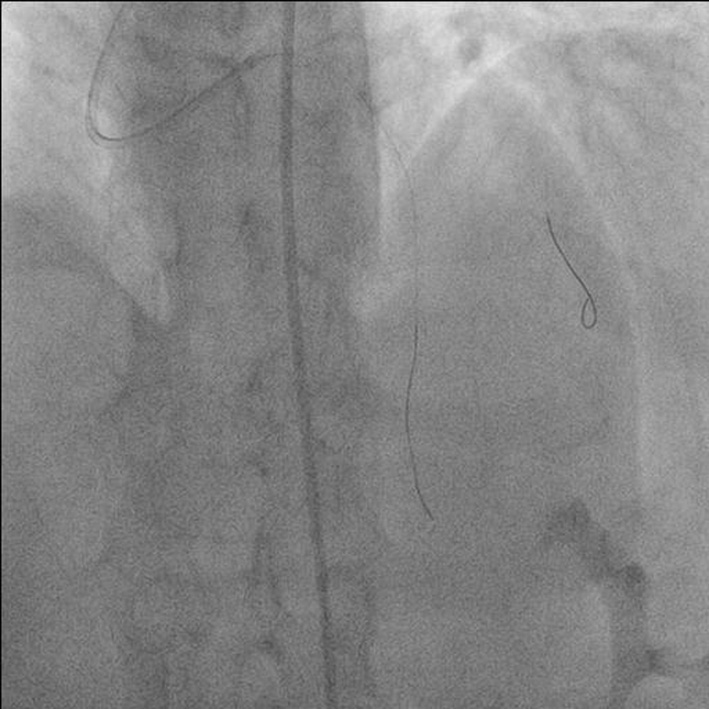
Figure 3. Antero-posterior (AP) cranial view showing broken distal segment of jailed wire in obtuse marginal branch of left circumflex artery (LCX).
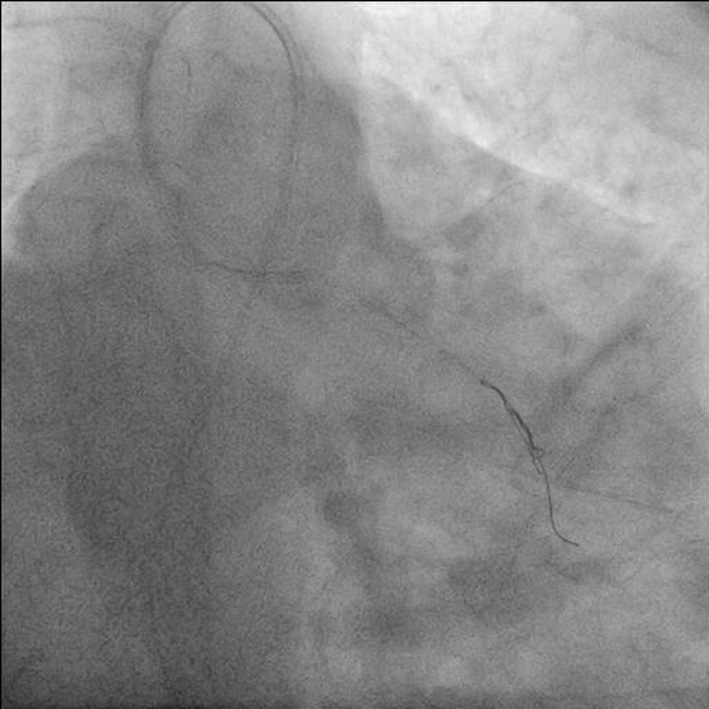
Figure 4. Antero-posterior (AP) caudal view showing distal segment of jailed wire being entangled by two BMW wires.
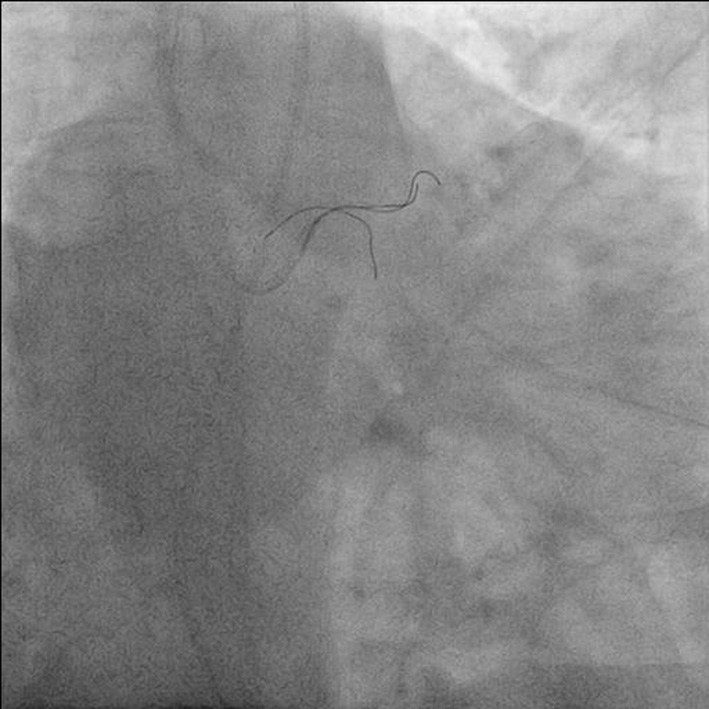
Figure 5. Antero-posterior (AP) caudal view showing one free end in aortic sinus and other end in proximal left circumflex artery (LCX).
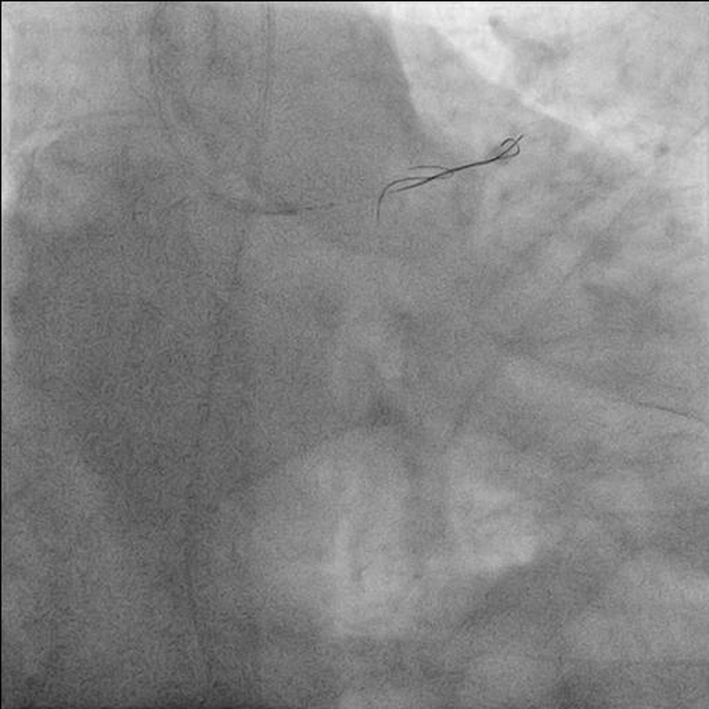
Figure 6. Antero-posterior (AP) caudal view showing broken wire in proximal left anterior descending (LAD) artery and other end in proximal LCX.
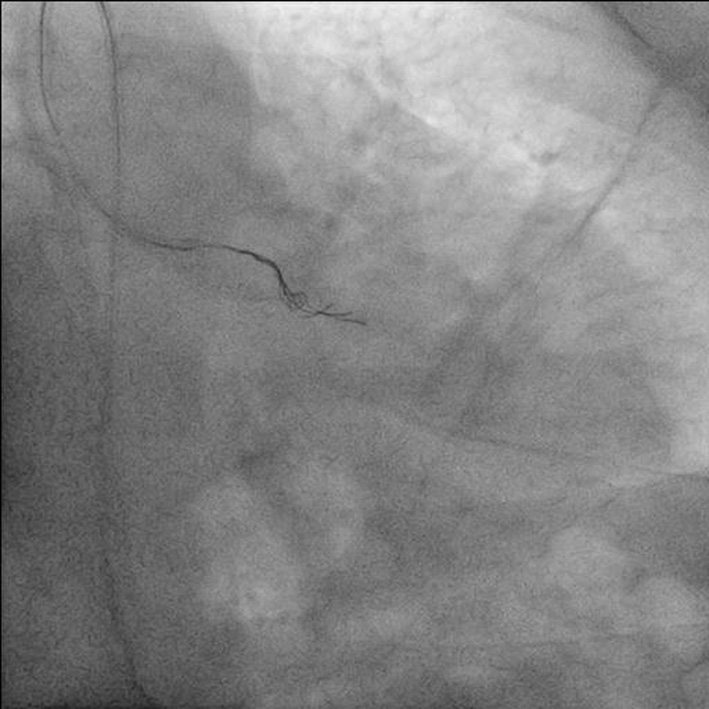
Figure 7. Antero-posterior (AP) caudal view showing distal segment of jailed wire being entangled by triple rescue wires.