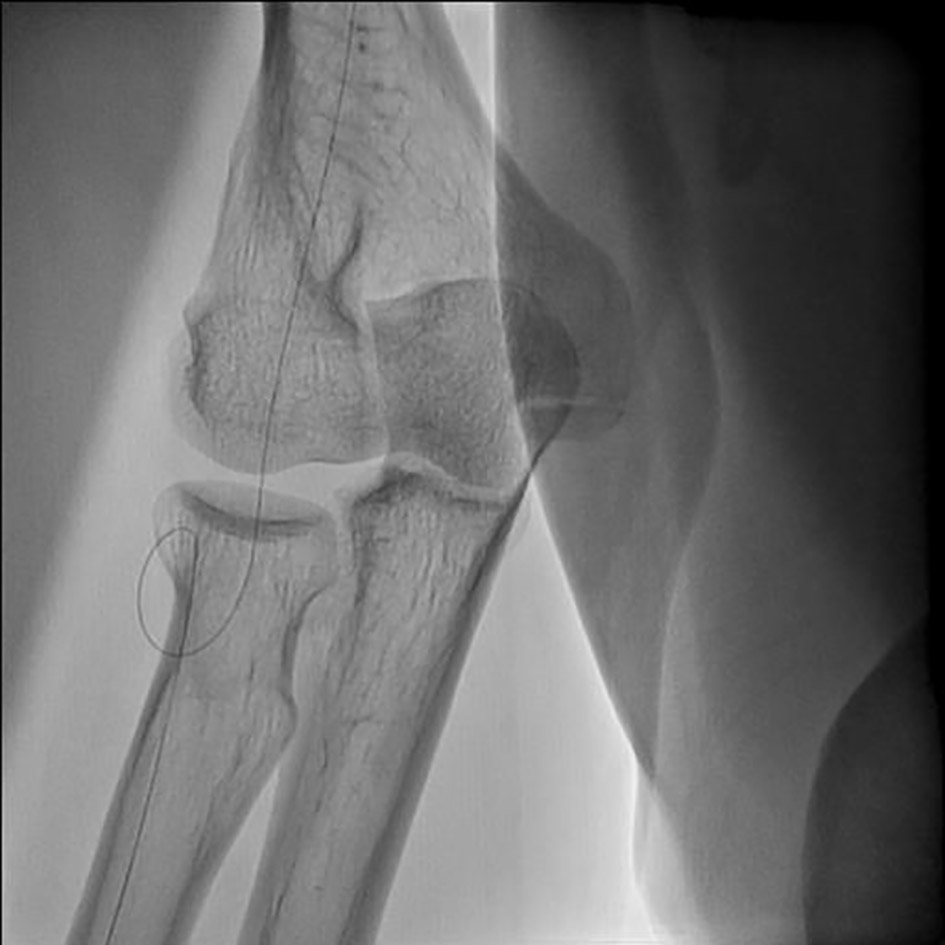
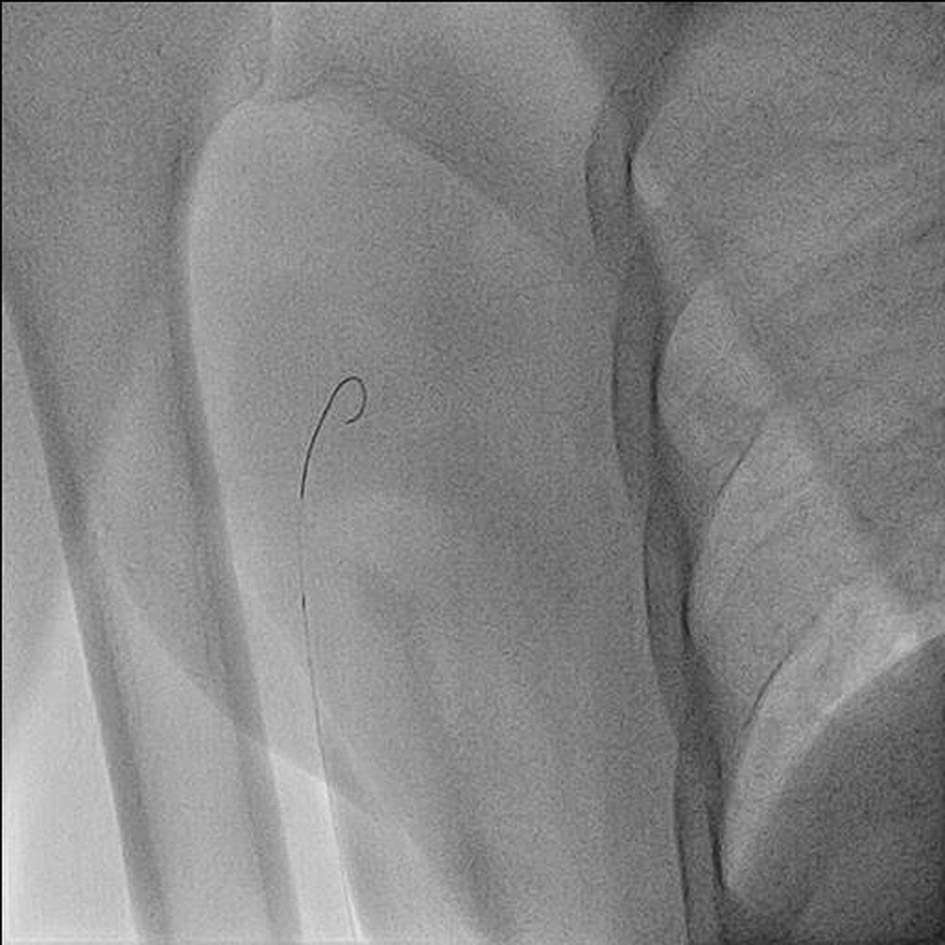
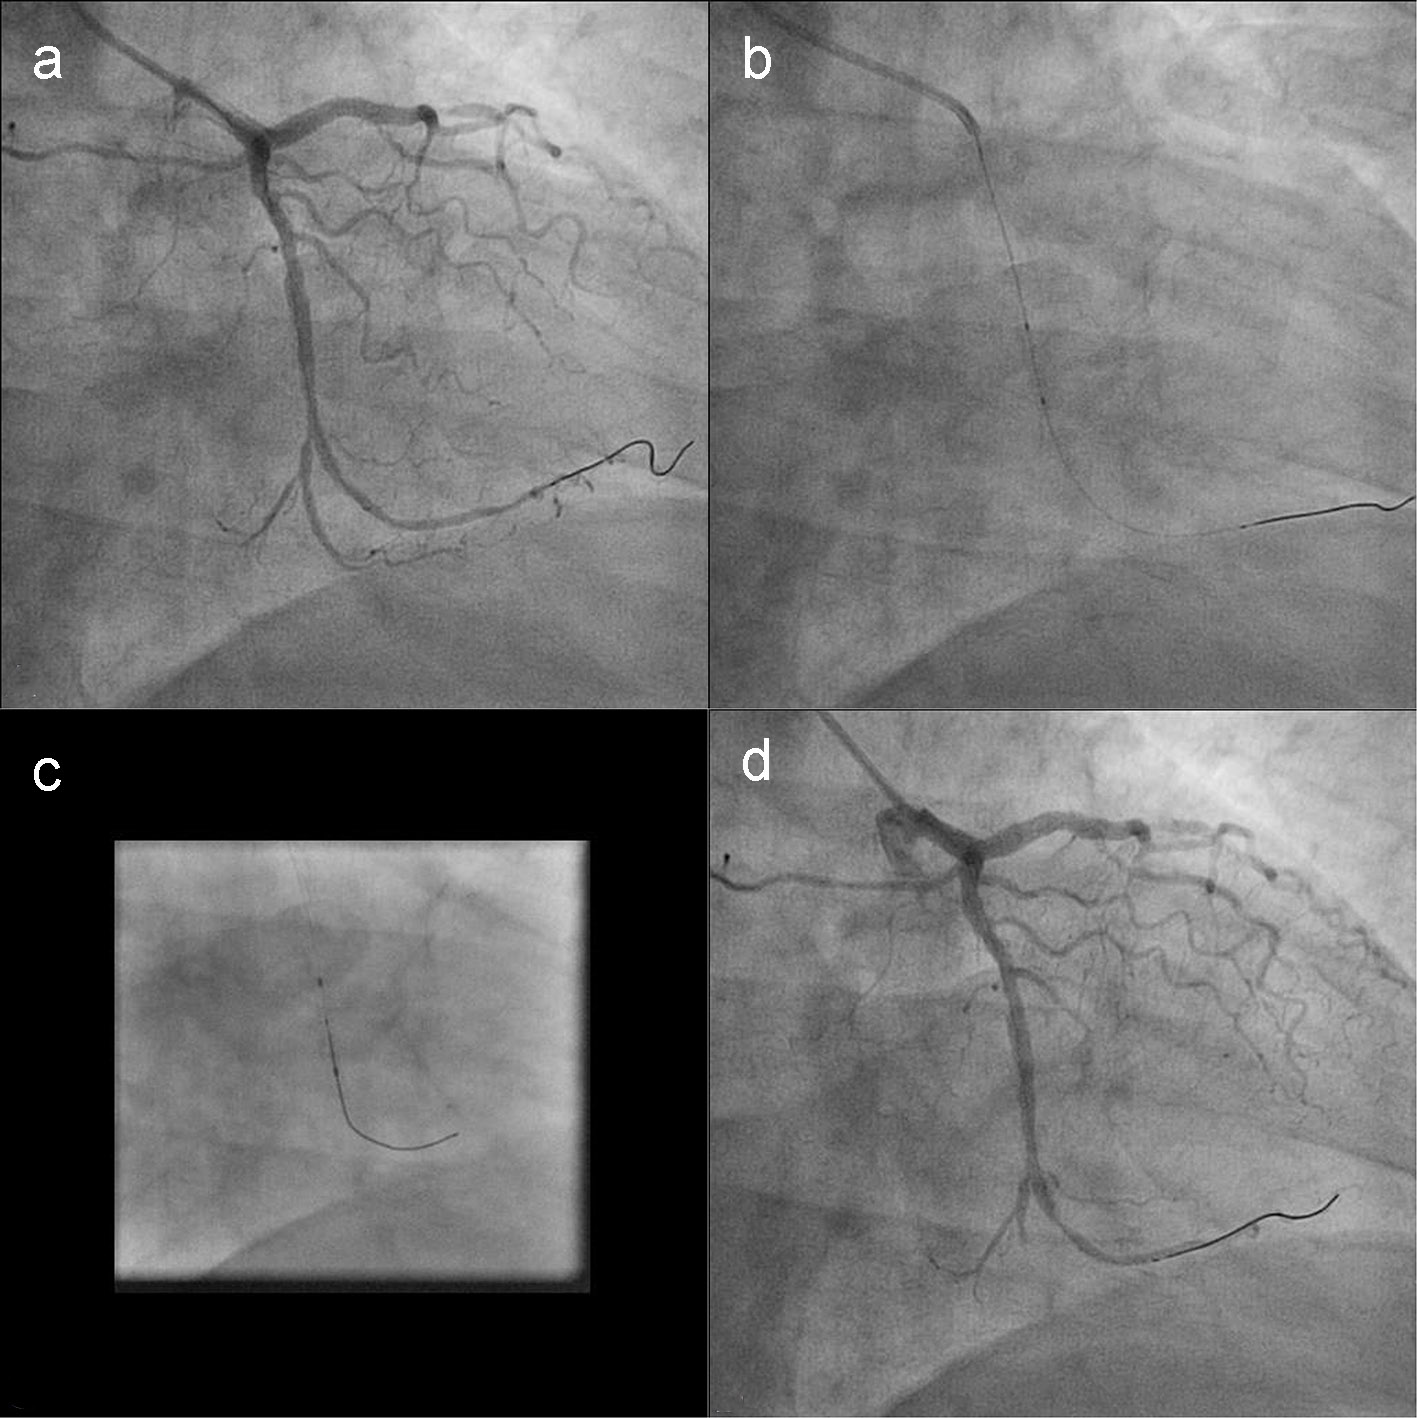
Figure 1. Double hairpin turn (white arrow) with 360° loop of radial artery (arrow head showing tip of the diagnostic catheter).
| Cardiology Research, ISSN 1923-2829 print, 1923-2837 online, Open Access |
| Article copyright, the authors; Journal compilation copyright, Cardiol Res and Elmer Press Inc |
| Journal website https://www.cardiologyres.org |
Case Report
Volume 8, Number 2, April 2017, pages 81-85
Primary Percutaneous Coronary Intervention Using BaLloon-Assisted Sliding and Tracking (BLAST) of Diagnostic Catheter to Negotiate Double Hairpin Loop of Radial Artery
Figures